Saturday, August 13, 2011

Ready to Plank

I just stopped working. All the stations are lined up and true with the bottom. I was on a roll and tempted to secure the bottom board and start planing but: Despite the fact that it's hard to make big mistakes with hand tools I did have a lot of wine at dinner and I decided I should wait. If you saw the typos in the first draft of this post you would agree that it was the right decision. I will place my order for fasteners this week, Woo-hoo! Hamilton Marine sells by the each, saving me more than 50% when compared to Jamestown Distributors. Jamestown has lower prices, but you have to buy the whole box. On a boat this small that is just not practical.
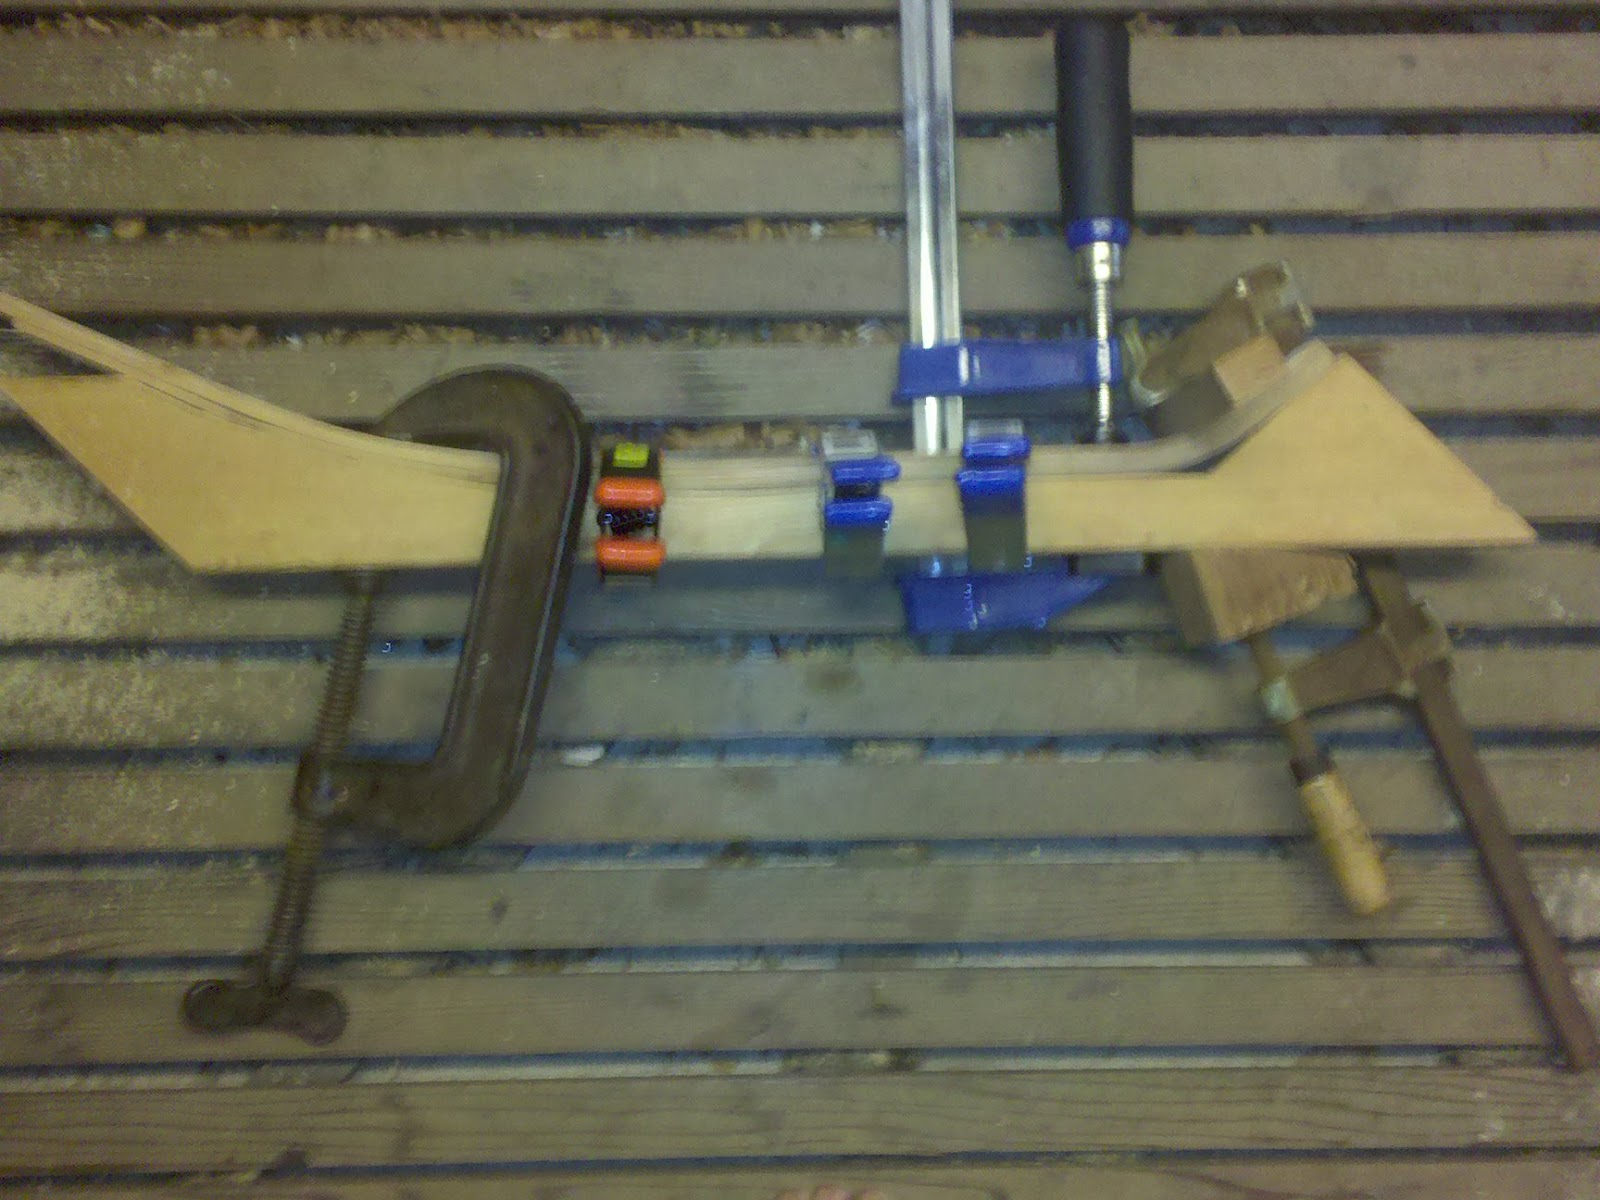
I was concerned about how I would secure the bottom board for planing it's edge. I dreamed up different saw-horse configurations with sandbag ballast to limit vibration. When it was time to do the work I set a couple of clamps on one end of my bench (since it doesn't have a vise yet) and clamped a temporary support to one end of the building jig. It worked perfectly. No cost, no permanent fixtures to store, and no chatter. I was super cautious on the first side, approaching the line in tiny increments. When I flipped the panel to do the other side I took a full turn on my Bailey #5 to get more aggressive and cut 75% off of my time.
Once again my images are AWOL. I'll publish without them if I can't locate them this week.

Tuesday, April 12, 2011

The Building Jig

I had intended to use a construction method that was a hybrid of Building Classic Small Craft, The Dory Book, and Brooks' How to Build Glued-Lapstrake Wooden Boats. After I left behind the idea of using frames I shifted wholesale to John Brooks' method. The photograph of John sailing Ellen was my first indication that I absolutely wanted to build lapstrake. I talked with him years ago about his designs for both Ellen and Francis and he made me feel very comfortable. I loved his building jig, and the level of detail in his book is excellent for a first-time builder.
I sorted through a whole bundle of framing lumber at Home Depot trying to locate straight enough stock for the jig. Whenever I have a job that doesn't call for high-grade material I buy the awful stuff so I can justify cherry picking the stock when it is essential. I eventually found enough acceptable stock and went home to build. Weather was nice and I was working with the garage door open. For the first time I started getting inquiries from the neighborhood..."What are you building there?", "Do you think it will float?", "Are you making a shed?" Seriously, people asked if I was making a shed. However, everyone was gracious and kind and I felt much less like the neighborhood kook than I expected to.

Strangely, all of the construction pictures of the building jig have come up missing. I've stopped publishing for a very long time while I try to locate them with no success. Maybe they'll turn up the moment I give up on them?

Here goes...

EDIT: Sure enough a few pics showed up within 15 minutes of publishing. They're better for showing how small my shop is than for the construction of the jig, but right now they are all I have.


Saturday, January 8, 2011

Getting Started

"A year from now you'll wish you had started today"
-Karen Lamb

I started out by lofting John Gardner's table of offsets. Lofting translates a chart of measurements into a two dimensional representation of the hull's shape. Apparently it's not a difficult process; I think it was Howard Chappelle who said "Any damn fool can learn it in an hour". I took more than an hour from which I suppose you may draw your own conclusions. I found Greg Rossel's "The Boatbuilder's Apprentice" to be the biggest help and managed to make a passable, if slow, job of it.

Everything fit on a 1/4 sheet of plywood. This, combined with the flat bottom made this design an easy first exercise in the process. Gardner's measurements are careful and accurate and they fair easily. Unfortunately in my haste to get started, I didn't paint the plywood before I began laying down the lines so everything is a little harder to read than it should be. None of the pictures of the lofting are worth posting but Sam did provide me with a point of inspiration to let me know what we were working towards.
I hadn't planned to rig her for sail, but he is somewhat emphatic on the point.


I agonized over whether or not to use ribs in the construction. I love the way the ribs accentuate the lines of a shapely hull, but are they necessary in a small boat built of glued lapstrake plywood? I have seen successful examples of the Herreshoff boat built frameless and I wanted to keep the weight and maintenance to a minimum. Eventually I decided to compromise: I would include ribs every 16" rather than 8" as designed.

I spent a great deal of time on the ribs. I traced and cut out the patterns and soaked the strips for two days prior to bending. After the soak I clamped the strips onto the bending forms and allowed them to dry for 4 days. Next I applied glue to the pre-bent strips and clamped them in place for several days.
Pre-soaked strips drying in the mold
Another frame clamped while the glue set
Finished glue up with the clamps removed
 

Everything looked great...for a while.

When I had about half of the frames glued up I noticed they were not holding their shape correctly. The longer they had been out of the molds the greater their tendency to straighten. I switched from Titebond III to Gorilla Glue with no improvement. Rats!

Epoxy might have done the job, or sanding the strips thin enough to add another layer to the glue-up. When all was said and done I decided to omit the ribs. I decided it was too much effort and expense for extra weight that was only going to make the boat look pretty. I would assemble a standard building jig and proceed without ribs.

Tuesday, December 14, 2010

Background

“All things are created twice. There's a mental or first creation, and a physical or second creation to all things.”
-Stephen Covey

I'm building a Herreshoff/Gardner Rowboat for my family to mess about in and (perhaps more importantly) to steep my kids in the notion that a person can do anything if they find the right books.

I love spending time in boats. I'm partial to canoes, believing that a boat is used in inverse proportion to it's weight. Most of my time afloat has been spent in a Redbird my dad built (published in the original Canoecraft). It's a great design, able to haul a lot of weight, and for years I really enjoyed it. When I had a couple of kids I discovered a problem. The payload was increasing, but nobody else was paddling. Even my wife had developed the tendency to watch the scenery go by and rarely dip a blade in the water. It was hard to generate enough force to get a 300+ pound load underway, or turn it once it was moving. I decided that a rowboat would approach the minimalist experience of the canoe, but would give me a mechanical advantage to help drive us forward.

Herreshoff Rowboat (Not mine, not Green Machine)

Three years ago we took a family vacation to Mystic Seaport and I tried rowing some peapods and their Herreshoff/Gardner Rowboat Green Machine. The peapods were nice, and certainly more stable, but Green Machine was so easily driven that I was sold. Loaded with the four people in my family plus my father she rowed with absolute grace and ease. I knew this was the boat to build. I already had the plans and I was ready to buy materials and get started...


Then we moved.
Then we had another baby.

Finally this year I got underway.